
I’m obsessed with potatoes, you probably love potatoes.
You’re going to learn everything you need to know to grow these beautiful crops and have them thriving wonderfully. We’ll start by talking about the types of potatoes, and there’s a confusing piece of terminology here you may have seen around.
Honestly, when I first saw it, I was like, what does that even mean? And that’s determinate vs. indeterminate potatoes.
If you’re a longtime gardener, you may have heard of determinate and indeterminate tomatoes — which are actually related to potatoes — but it doesn’t work quite the same way in the potato world. To explain, one of my longtime gardening friends, Tony, over in the UK, is going to break it down.
Determinate potatoes are also known as first earlies and second earlies, and they’re known for their quick-growing nature, typically taking around 10 to 12 weeks to mature. They’re smaller in size, but perfect for things like salad potatoes. A great variety here is Red Pontiac, which is a second early. Second earlies are also determinate but tend to grow slightly larger and take about 13 to 15 weeks to mature — Charlotte is one of my favorites.
Maincrop potatoes, on the other hand, are considered indeterminate, and they’re the biggest varieties you can grow. They’re super versatile — you can use them for large baked potatoes, mashed potatoes, roasted, fries, wedges — really, anything.
These take longer to grow, generally 16 to 22 weeks, and the great thing about indeterminate potatoes is that they grow on multiple levels along the root system, while determinate ones only grow on a single level.
So you can choose to grow first earlies, second earlies, maincrop, or a mix of all three. But there are a few other things to consider when selecting the perfect potatoes for your garden — first, color. You’ve got red, yellow, white, pink, even blue. I’m growing one called Adirondack Blue this year — we’ll see how that goes. So they can be fun, but more important than color is really texture.
Right here, I’ve got a Norland Red potato — this is what we call a waxy-style potato. It’s higher in moisture, has a bit of a glossy mouthfeel, and it’s great for boiling, slicing, and tossing into a salad. Then you’ve got floury-style potatoes, like the Russet, which is probably the best-known example. These are great for making fries, baking, mashing — any kind of prep where that fluffiness and starchiness can soak up flavor and give you a delicious result.
So when thinking about what potatoes to grow, think about how you want to eat them — and that can help determine the type you choose.
To chit or not to chit your potatoes — that is the question. It’s a weird word, I’m not a huge fan of saying it, but I picked it up from my British gardening friends — it’s their term for pre-sprouting your potatoes. Whether you’re planting what’s called a seed potato — which is a potato grown specifically for planting — or using an organic grocery store potato, this is a method that can boost your productivity, especially if you live in a colder climate with a short growing season.
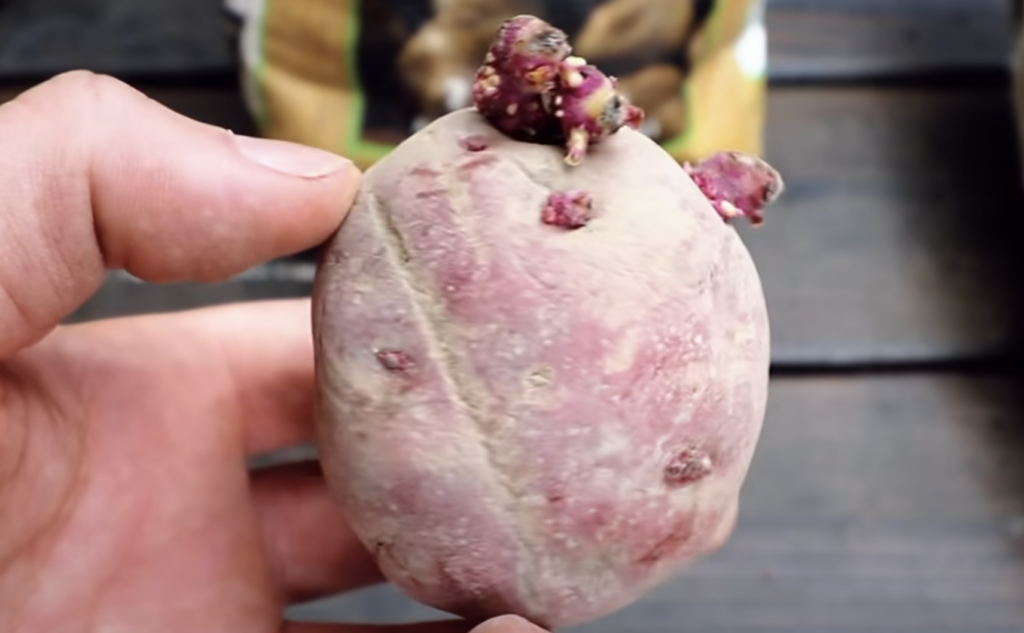
What you’re looking for on your potato are these little things called eyes — you can see some small examples here.
It’s like a little pocket where a sprout will emerge, and that’s what chitting is — encouraging those sprouts to grow a bit.
To do this, place your potatoes — maybe in an egg carton — in a cool area with some light, positioning them so most of the eyes are facing up, since that’s the direction you want the sprouts to grow.
You’ll want to do this about 4 to 6 weeks before you plan to plant. You’ll see about an inch (2.5 cm) of sprout coming out of the eyes, and that’s when you’re ready to plant. But let me be clear — you don’t have to chit your potatoes.
I’ve had potatoes I forgot to harvest last season sprout underground and come right back up. But I do recommend it if you’re in a colder climate. If you’re in a warmer one like mine, sometimes I just toss my potatoes straight into the soil.
Now we’re finally ready to plant these potatoes. I’m going to show you four different methods, depending on what you like to do, where you live, and all that. First up, let’s go with the 5-gallon bucket method and a grow bag method for you container gardeners.
Let’s talk about potato size. This one’s small — I count about three eyes on it. This one, same variety, is just a larger seed potato, and it’s got around six eyes. So if you want to stretch your potato-buying budget, what I’d do is cut this one in half, making sure each half has at least two eyes.
Let it heal for about two days, or dust it with some kind of powder to seal it up, so it doesn’t rot in the ground. That way, you’ve now got two seed potatoes from one.
For the 5-gallon bucket, I’ve got a standard one here. I’ll fill it with basic potting soil. The beauty of potatoes is that while it can help to give them some fertility, they’ll grow even in fairly poor soil and still be like, “Hey, I’m good.”
My personal preference in a bucket is to plant one solid seed potato. I’ll bury it about 2 to 3 inches (5–7.5 cm) deep, right in the center. For extra credit, make sure the eyes are facing up, so they don’t have to work as hard to reach the surface. Cover it, water it, and you’re done. Now just wait for it to sprout, and as it grows, keep hilling up the soil until you reach the top.
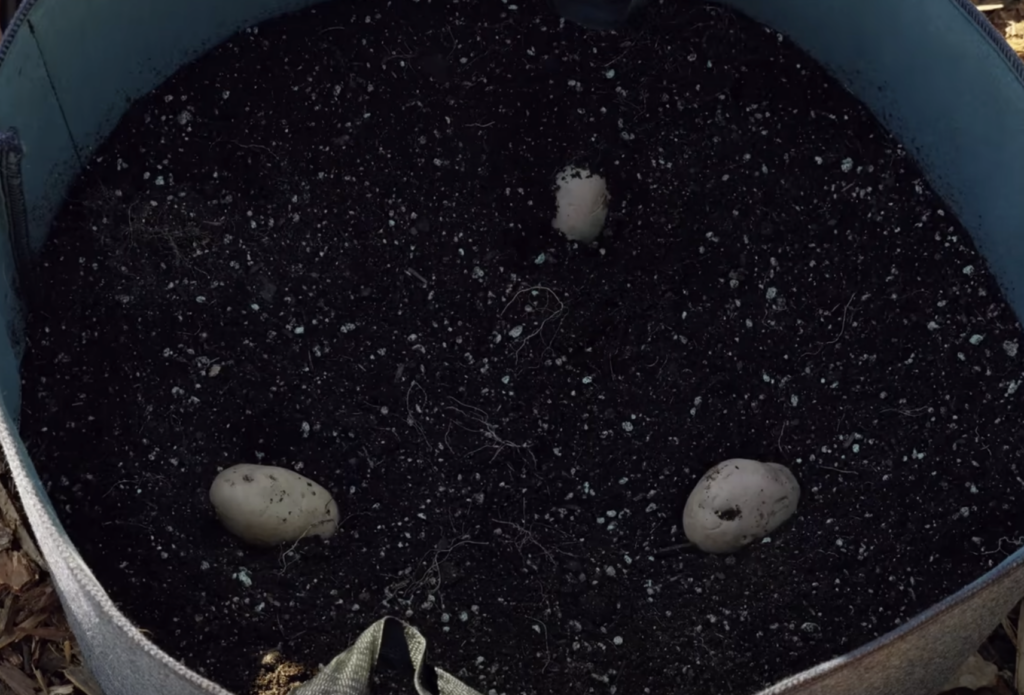
For the grow bag, which is bigger, I’ve got room for probably three potatoes. I’ll take the two cut pieces and maybe a small extra one, arrange them in a triangle pattern, eyes up, cover with a few inches of soil. You don’t need to fill the whole bag — you’ll add more soil as it grows. Keep in mind that some early varieties don’t really produce much in the hilled-up area, but I still like to do it anyway — never hurts to try!
A fun thing about grow bags is that since the sides are flexible, you can roll them down and give your plants earlier access to sunlight — unlike a solid bucket. These are reflective grow bags, so you can even see the lining here — just a neat little bonus tip.
Now onto in-ground options, which have become my favorite way to grow potatoes. I’ve become a true in-ground potato lover, and these tips also apply to raised beds if that’s your style.
I’ve got this 4×4 space, and I’m going to show two in-soil planting techniques, because potatoes are super forgiving and let you play around.
First, I’ll just use a shovel to gently loosen the soil — mainly because I’ve stepped on this area a lot. Potatoes grow underground on what are called stolons, forming into little tubers, so loosening the soil helps them form more easily.
Now let me show you what I’d call the classic trench method. This is a super efficient way to plant in rows. Dig a trench about 6 to 8 inches (15–20 cm) deep.
I plant a bit deeper in the ground than in containers, because I don’t plan to hill as much. Then, just space your potatoes about 12 inches (30 cm) apart. Too close, and they’ll compete for nutrients and space. You can even space them 15–18 inches (38–45 cm) apart.
Cover the trench, and that’s it. You might be wondering about soil type — like I said, potatoes are pioneer crops. You don’t have to amend the soil, but you can. A little compost wouldn’t hurt. When I first moved into my home and started Epic Homestead, I literally threw them into hard clay and they still did fine.
Now if you want a lazy potato method, this one’s for you — also known as the Ruth Stout method. I’m just loosening the soil a bit here — Ruth probably wouldn’t have even done that. She’d laugh at me from the grave. She just tossed her potatoes on the ground, covered them with straw, and went on with her life.
So I dig a super shallow trench — just enough for this method — toss in the potatoes with the same spacing as before. Boom, boom. Let’s throw in two more. Done. Now you’re probably wondering how they’ll grow. Well, we grab some straw — Ruth used hay or whatever was around — and we just pile it on top. This keeps moisture in, protects them from sun (which turns potatoes green — not ideal), and keeps them cool.
Contrary to popular belief, you can technically eat a green potato — it just won’t taste good. And no, it won’t kill you. I’ve got that straight from my friend Potato Taii, who runs probably the largest potato farm in Canada.
That’s all you need to do for the Ruth Stout method — it’s perfect for lazy gardeners or if you’re growing earlies or second earlies that don’t need hilling and can be harvested as new potatoes. In about 12 weeks, just pull the straw aside and — boom — there they are. No digging required.
Growing potatoes is honestly one of the most fun things you can do in the garden — especially if you have kids or just love playing in the dirt like I do.
Full potato playlist here. We got our seed potatoes this year from Wood Prairie Farms — we love them. Good luck in the garden, and keep on growing!