
Whether you’ve never planted anything before or you already have a little garden at home, one thing I guarantee:
growing strawberries in hanging pots is one of the most rewarding gardening experiences out there.
And I’m not just talking about the taste (which is amazing). I’m talking about the look, the convenience, and the joy of watching the fruit appear, hanging down, looking like a little living decoration.
At first, I thought it would be tricky too. Strawberries always seemed like a picky fruit—European style, cold climate, full of demands. But I learned, by trying it out myself, that yes, you can definitely grow strawberries in hanging pots—and it works beautifully.
Wanna learn how to do it, step by step? Let’s go, I’ll walk you through everything.
Why choose hanging pots for strawberries?
Before anything else, let me explain why growing strawberries in hanging pots might be one of the best decisions you’ll make for your garden.
First: it saves space. If you live in an apartment or have a small backyard, using your wall or a vertical structure makes a huge difference.
Second: it helps prevent pests.
Because the pot is elevated, soil pests—like slugs, ants, and fungi—have a much harder time reaching your plant.
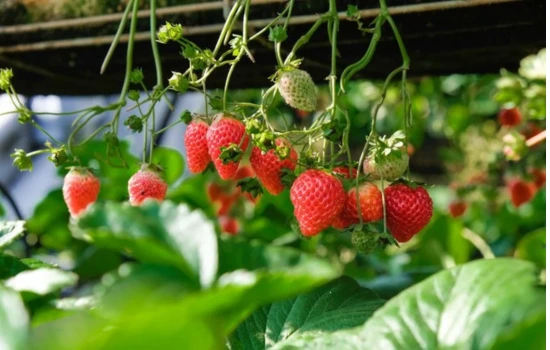
Third: it looks amazing.
Seriously, strawberries hanging down with the leaves draping over the sides and the red fruit showing up? Instant natural decor.
So basically—convenience, protection, and beauty. Hard to beat that combo.
What kind of pot should you use? Size and material matter
This might sound simple, but lots of people mess it up: your pot needs to give the strawberry plant space to grow properly.
I recommend pots with at least 20 cm (8 inches) of depth and a decent width.
Strawberries don’t root deep, but they need lateral space and good drainage.
As for the material? Plastic, ceramic, or even a cut-up PET bottle all work.
What matters is that the pot has:
- Drainage holes (absolutely necessary)
- A dish or drainage system to avoid flooding
- A sturdy way to hang it (no duct-tape miracles, okay?)
Which strawberry variety should you grow?
There are tons of options, but let me make it easy for you.
Here are the varieties that worked best for me:
- Oso Grande – Big, juicy, and strong
- Camarosa – Popular and heat-tolerant
- Albion – Produces almost year-round. Great for continuous harvest
If you can get a rooted seedling, even better. It skips the hardest part (germination) and gets you to harvest quicker.
How to grow strawberries in hanging pots: the full step-by-step
Now we’re talking. Let’s get into the full step-by-step of how to grow strawberries in hanging pots, exactly the way I do it.
1. Pick a sunny spot
The pot needs to be in a spot that gets at least 4 hours of direct sun per day.
If it gets full sun all day, even better.
Strawberries love light, and it has a big impact on flavor.
Avoid placing them where they’ll get strong wind or heavy rain—it can damage the leaves and fruit.
2. Prepare the soil with love
Strawberries prefer well-draining, fertile, slightly acidic soil.
Here’s my go-to mix:
- 40% soft, fluffy soil
- 40% organic compost (worm castings or cured manure)
- 20% coarse sand or perlite for better drainage
Mix it all in a bucket before filling the pot.
If you’ve got crushed eggshell or bone meal, add a little too—it helps root development and strengthens the plant.
3. Planting the seedling
Make a small hole in the center of the pot, about 5–7 cm (2–3 in) deep.
Gently place the seedling in, covering the roots, but don’t bury the crown (that center part of the plant).
If it’s buried, it can rot.
Firm the soil around it and water gently right after.
4. Water just right
Strawberries love moisture—but hate soggy roots.
My golden rule: stick your finger in the soil.
If it feels moist, don’t water. If dry, water.
I usually water every other day, depending on the weather.
Always water in the morning, so the plant doesn’t sit soaked during the hottest hours.
5. Feed regularly—but don’t overdo it
Strawberries fruit over a long period, so they need nutrients consistently.
Every 15 days, I use a homemade fertilizer—banana peel tea poured at the base (never on the leaves!).
Or you can go with diluted 10-10-10 NPK fertilizer.
Just go easy. Too much fertilizer = leafy plant, barely any fruit.
Extra tips I’ve learned (that nobody tells you)
Now here are some golden nuggets I picked up through trial and error:
- Remove early flowers. It helps the plant focus on growing before it starts producing.
- Don’t let the fruit touch the pot edges. They burn from heat or rot from moisture.
- Trim side shoots. They steal energy from the fruit and slow things down.
Oh—and once those first fruits show up, get ready for birds.
I had to put up mesh around mine because they kept stealing the ripe ones before I could!
Why I fell in love with growing strawberries in hanging pots
You know why I insist on this topic?
Because growing strawberries in hanging pots became a joyful addiction for me.
I’ve now got pots hanging on my balcony, my back wall, and even a wood rack I built for my laundry area.
Besides picking fresh fruit, everyone who visits compliments how beautiful it looks. It’s both garden and decor at the same time.
And best of all: no big yard needed, no muddy ground, and you get to eat something you grew yourself.
Just to lock it in: how to grow strawberries in hanging pots
If you’re after something practical, beautiful, and productive—especially in small spaces—how to grow strawberries in hanging pots is your answer.
With some sunlight, fluffy soil, proper watering, and just a bit of love, you’ll harvest beautiful, sweet, healthy strawberries in no time.
Try it out yourself.
Then come back and tell me how it went.
Oh—and if you want a visual step-by-step or a simple illustrated checklist, just let me know.
I’ll happily make one for you. Let’s grow together! 🍓